
More than two years ago, I received information about a new camera that we would announce at NAB2014. Specs were amazing and the body… my first impression from the photos was “weird”. That curved rear part, with an extensible arm, was really “new”, especially compared to the box-shaped modular bodies existing at that time, like FS100, FS700, F5…
But then I arrived to our booth, searching for it. And the moment I held the PXW-FS7 in my shoulder and grabbed the grip, I understood everything. I simply was willing to shoot.
One year later, FS5 arrived. Again, a little revolution: modular yet stand-alone, also extermely powerful, with the chance to use any lens, as we could do with FS series and E-Mount Alpha series. Tiny, with a similar grip to FS7, but without that arm… and with one nice brainchild: that electronic variable ND filter. Originally, it allowed us to assign different shutter values to its 3 position, and play with its value with the body dial or, even better, the grip’s one.
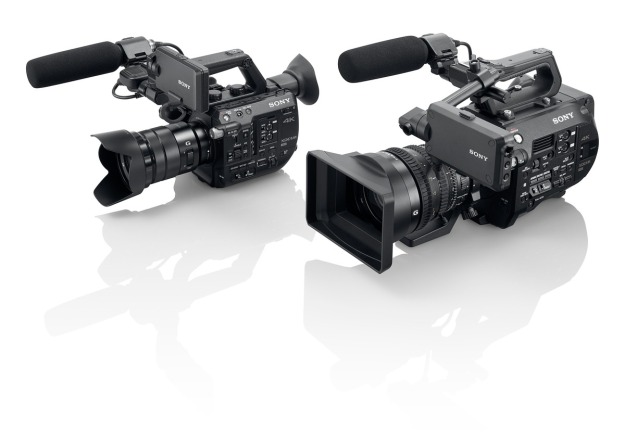
And now, 2 years later than FS7 was announced, we are glad to see how an improved FS7 will be living in parallel with the original model.
Say hello to FS7 II. I did it in my YouTube channel: https://www.youtube.com/channel/UCMUk_ztypSGRWw23mawsi0g
ELECTRONIC VARIABLE ND FILTER
As said, it was applied to the Super35 mm sensor in FS5, but, actually, it had been already used in PXW-X180 and X160. From my humble point of view, it’s fine to have it in a “news/ENG” handy model, but it is even better when used in a Large Format Sensor.
A LFS means, as you all know, basically a muche shallower depth of field.
A typical situation when shooting “reality” (documentaries, news…), as opposite to “fiction”, is that we don’t use to have the environment under our control, and that applies to light, too. So, imagine that you’re shooting in an indoor-to-outdoor situation: since light will probably be higher outdoors, we need to reduce it. A newbie like me would probably close iris. Or you can also adust exposure. But in both cases we are modifying the original picture aesthetics, as we’re increasing the DoF or changing the movie cadence, it’s “fluence”.
It’s very typical to use optical ND filters to avoid that aesthetics shift. But they use to be external (not controlled from camera body), and, obviously, one more parameter –and equipment- to bear in mind.
On FS5 and FS7 II Electronic Variable ND Filter we have 3 main modes:
1. Instead of the classical Clear / 1/4 / 1/16 / 1/64 filter wheel, now it is Clear / 1 / 2 / 3, meaning we can assign values as we want, from various shutter values. So, for instance, if you’ve been testing before the shoot and you realize that indoor it should be 1/8 but outdoors it matches with 1/32, you can assign those values to positions 1 and 2, making your shift much faster.
2. From any of those three positions (1, 2 or 3), if we switch the filter position to “Variable” instead of preset, we can adjust its shuttering value by a dial (from 1/4 to 1/128). Such dial can be the one in the camera body (also shared with Iris), or the grip’s one –which I prefer, personally-. Our creative chances are unique, thanks to that (imagine you can control surrounding light; you can modify DoF without light visible change.
3. The third mode is Auto mode: camcorder analyzes light approaching the sensor, and automacially adjusts ND filter so that we can have the same light level –in a certain limit, between 1/4 and 1/128. So, that indoor-to-outdoor travelling shouldn’t be a worrying factor any longer; you can keep the same DoF and the same shutter speed.
That invention is fine in concept, but how does it work?
Basically, it’s an LCD layer before the sensor. Light will have chaotic polarization when leaving the lens. Then, it’ll pass through a polarizer and a transparent electrode, an LCD layer, another electrode and another polarizing filter. The first polarizer “aligns” light so that it has a certain fixed polarization when leaving it –let’s say, horizontal polarization.

Depending on the voltage applied to the electrodes, liquid crystal mollecules will turn their position and will “twist light” (varying polarizing angle). Finally, a vertical –this is just an example- polarizing filter appears, and depending on such angle, light will be more or less capable to trespass that polarizer. Obviously, what camera (or we) actually controls is voltage applied to LC.
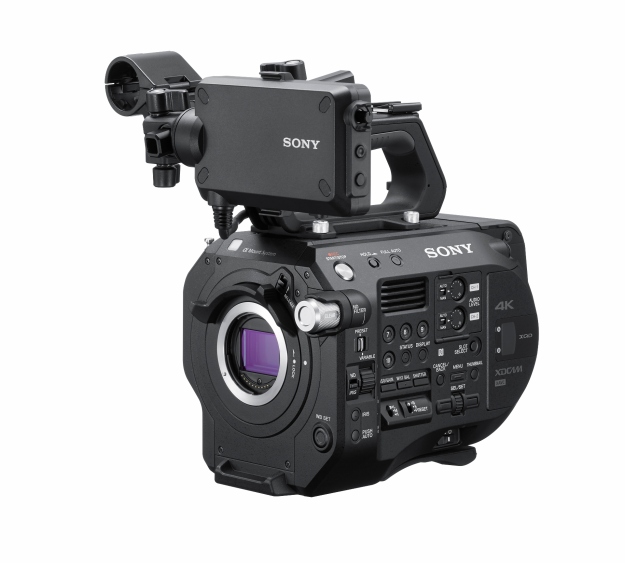
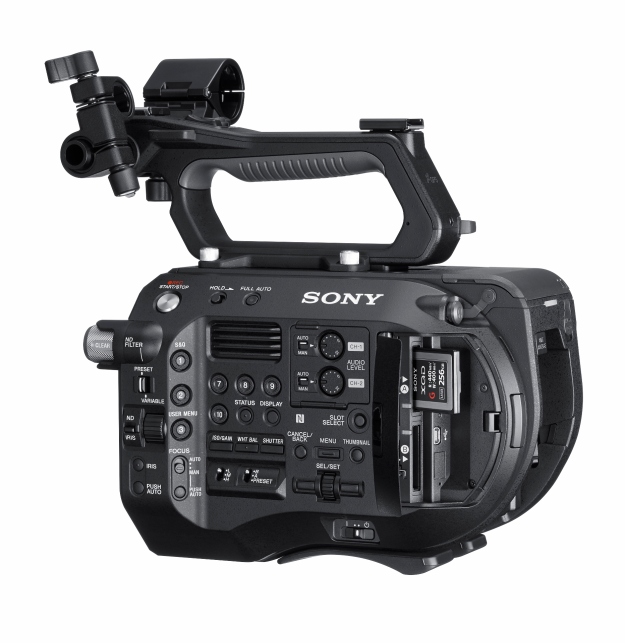
LEVER LOCK-TYPE E-MOUNT
As you know, one of the main advantages we have been showing since years ago (actually, FS100 was the first professional camcorder to incorporate it) is the capability to use virtually ANY lens over the E-mount. This is mainly due to the short flange back distance, between sensor and top of the mount. Since such distance is really short (18mm), users can “build” their own lens, via adapter. Or you can convert your Sony camcorder into any mount; you can see it also from this perspective.
In the professional market belonging to broadcast and cinema, however, we received a lot of feedback about E-mount: swinging the lens is necessary to attach it to the camcorder, and that is sometimes a bit difficult, especially when big broadcast lenses are being used, or the lens is surrounded by rod bars, mattebox, follow-focus… In that case, a straight installation is preferred.
And that’s what we got with the new Lever Lock-type E-mount: a white dot in the lens needs to be put in front of another white dot in the camera mount. Then, a lock switch can be released, and a collar will embrace lens bottom. Basically, such mechanism is pretty similar to PL mount (in fact, it is actually a Positive Lock attachment).

To be honest, the first time I used it I felt it a bit more complicated than regular E-mount. But after getting used to it, I simply LOVE it.
MECHANICAL IMPROVEMENTS
There are several improvements from FS7 in FS7 II, but instead of having a different section for each one, let me share the same space for them all. A lot of feedback has been taken in mind for PXW-FS7M2 (the official reference).
Firstly, the grip arm: if you have worked with your own FS7, this was not a real issue, but when the same camcorder was used by different cameramen, it was very likely to need different arm lenghts. And for such adjustment, a couple of screws needed to be loosen and tightened; thus, a screwdriver needed to be on set –nothing really nice if you use to fly-. Now, a knob is replacing those screws, so it’s much easier to get a proper arm length, and it can be done without the need to leave the camcorder holding in your arms.
As you can see, there is also a second knob; the one used for the Arri rossette. Now, that knob can be totally detached and inserted in another whole (hidden when the arm is totally folded), allowing you to use FS7 II in a lower position, laying in your belly as you could do with FS5, which is much more typical in fictional footages than an eye-heighted shot (normally for news/ENG).

Oh, and by folding the arm towards the rear side, we can lay the camcorder in a table, not in “diagonal” layout .
Also, a small but significant change can be found in the left side of the camcorder, close to the screen: instead of a circular rod bar for the LCD, now that bar is square-shaped. Some users, depending on the air humidity, tightening force, etc, could see in FS7 that LCD screen could “fold down” unintentionally, losing the horizontal position. Thanks to this square rod bar, and to the knobs for each adjustment, we can place the LCD screen in any position, strongly tightened in place. Also, if we are still willing to use 15mm rod bars, we can use it, because there are supplied rubber adaptors that convert 15mm circular holes into square ones.

There’s still another physical change in that part of the camera: in FS7, a couple of clamps needed to be attached to the rear part of the screen, to keep the eyepiece in place. Now, just the lower one is needed, as the upper one is simply a “clip” that we don’t need to tighten, but just to put in place. So, we can attach or detach the eyepiece with just one hand.
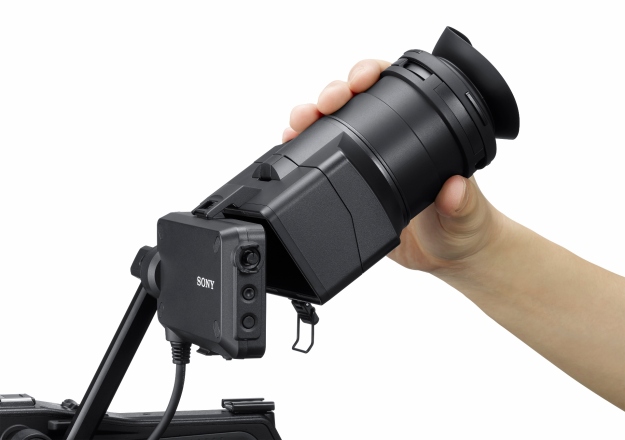
And that same way to attach/detach is applied to the new screen foldable hood that is supplied by default. FS7 II is a camcorder very likely to be found in outdoors shootings; that hood will allow us to correctly see the picture in the screen with lower reflections. Also, the small size when folded prevents us to carry the eyepiece just to put it open over the LCD.

In the card slots area a little improvement has been added: now, when the card is ejected, the part of it you can grab is 8 mm. Oh, by the way, talking about cards, what I strongly recommend is to use G or S series in order to get the best from the camcorder. That way, every codec, including 4K 10-bit 422 at 500/600Mbps can be registered.
Keeping in the left side of the FS7 II, and just a bit before the card slots, we can find the audio controls. In FS7, the audio cover would deploy horizontally, and some users, when not closing it perfectly, experienced the awful experience of breaking it when hitting from above. Now, even if anything drops and hits that cap, it opens twisting around a horizontal axis, so it will only –and presumably- open, but won’t break.

And, as a last improvement regarding physical aspects on FS7 II, there was a situation in FS7: if you simply connected wrongly the LCD bus and switched on the camera, you couldn’t know whether it was not working due to battery or any reason. Now, a green LED has been placed just above the power switch, allowing to easily observe if the camera is actually powered. Don’t worry about it: such LED is not very intense, so it won’t ruin your low-light footages.

ASSIGNABLE BUTTONS
First of all, let me confess that I don’t usually like or use tactile screens. Simply, I don’t get the idea of putting your fingers on your monitoring system. Especially after eating a hamburguer or applying sunscreen. In other words: I prefer by far BUTTONS. And especially those buttons that I don’t need to look at to locate or push.
As we had on most of Sony camcorders, there are assignable buttons. And, like in FS7 or FS5, in the camera body they are ring-shaped and with a little “extrusion” across the ring. This allows cameraman to easily find them just but slightly touching with his/her fingertips.
But in FS7 we had 3 assignable buttons in the grip (yes, button #6 is that one that took a while to find) and other 3 in the camera body, in its left panel.

Now, in FS7 II, we have 4 MORE, making a total of 10 assignable buttons.

In my case, I prefer to use S&Q for direct access to Super Slow Motion (without passing through the “normal” S&Q), but in button #2 I use to assign Auto ND function; yes, obviously, we can assign the same functions as in FS7 + the ones related to ND filter.
SENSOR
FS7 II’s sensor is exactly the same as F5, FS7 or FS5: a Super35 mm sensor with CMOS technology, very fast readout, and 4K resolution.
Color space, thus, keeps the same, but now the chance to record over BT.2020 has been added, additionally to the original S-Gamut3 and S-Gamut3.Cine.

As you perfectly know, this HDR sensor can maximize its huge dynamic range via S-Log2 and S-Log3 gamma curves.
Just for reference, the cause to use a S-Log curve is because we want to “adapt” all that big dynamic range into a limited output (voltaje or digital values). If a linear curve is applied, saturation can be reached in a short input range (for instance, in 709 gamma curve, despite it is not purely linear). In a S-Log transfer, up to 1300% dynamic range can be acquired, and while low lights keep linear-ish, high lights are compressed. The aesthetics we could see are like “flat” or even “overexposed”, but we could apply an “anti-Slog” curve to linearize signal and recover the whole dynamic range that was captured. In case we need a “natural” look in our monitors (either because we are not totally use to visualize S-Log materials, or because we want to evaluate the final result), we can apply a 1D or 3D LUT, even designed by us (e.g. via RAW Viewer).
Nice, but… what is that wide dynamic range useful for? Imagine a scene in which we have two “stories”: one of them happening in a room, with low lights. Another one is happening outside, and could be seen through the window. With a SDR camera (about 6 stops), we would need to “choose” between both stories: the one happening in low lights- with the window overexposed-, or the one outside –and the inside one would be with stick blacks-. Through a HDR camera, we can record BOTH stories; in postproduction, we can simply apply that mentioned LUT to recover both materials. Or, even, if you’re shooting outdoors, clouds won’t be just flat white, but all their grey tones can be recovered.
There’s also a very useful function in FS7 II and FS7: HiKey y LoKey allow us to use a SDR range (for instance, because we might be using SDR monitors, not HDR) in either high or low lights. Thanks to that, we can evaluate both ranges of the images even if the rest of the equipment is not totally HDR-ready.
And now let me give a personal tip: once we have used S-Log curves, we feel “relaxed” because we can recover all the info, even if it seems overexposed. Then, we get used to work with them, and suddenly we get into a low-light environment, and experience the surprise to see that our image is a bit noisy. OK, very “organic” or “filmic” noise… but noise. That’s because S-Log curve is defined by standard to work with a minimum ISO3200 which means that for lowest levels, a minimum gain is applied. It’s not a problem in your camera; it’s a matter of how S-Log is defined. So, that is my tip: use S-Log if you need it, which doesn’t necessarily mean “always”.
SLOW-MOTION
Slow-motion features keep the same as in FS7: up to 180fps in Full HD resolution in NTSC mode, and up to 240fps with RAW output.
In fact, that’s a good indicator when we want to know how a camera behaves with rolling-shutter derivated effects: having a super slow-motion module means that sensor can be read fast enough to include much more frames in the same time period. So, if that readout is fast, the time that exists between the first and the last line in a frame is also very short, and, thus, jelly and banding effects are minimum.
RECORDING
FS7 II and FS7 can record internally up to 422 colour sampling, 10-bit, 4K-resolution over a XAVC Intra codec. As you can imagine, such big quality requires an according bandwidth, which is 500Mbps at 50p and 600 at 60p.
In a broadcast/news environment, it is very likely to find MPEG-2 (“XDCAM”, despite that’s not the codec, but the product family) capable systems. Despite XAVC offers better quality at the same 50Mbps, it’s a reality that MPEG-2 is, as of today, the de-facto codec in broadcast stations. So, for those needs, in Full HD resolution there is also the chance to record MPEG-2 422 10-bit, and not only XAVC.

All those codecs can be registered over XQD cards in the internal recording. But in case we use XDCA-FS7 adapter, there’s also the capability to record over ProRes. And, of course, XDCA-FS7 allows us to output RAW data stream from FS7 II.
Some of you may wonder: if FS7 II/FS7’s BNC connector is 3G-SDI, which allows a maximum of 2K/60p quality, how could a 4K/60p/50p signal be outputted? Well, actually, 4K signal is not actually outputted but “transmitted” after a conversion into data. So, baseband video is not routed throught the SDI connector; that cable is just used as a transmission system for data.

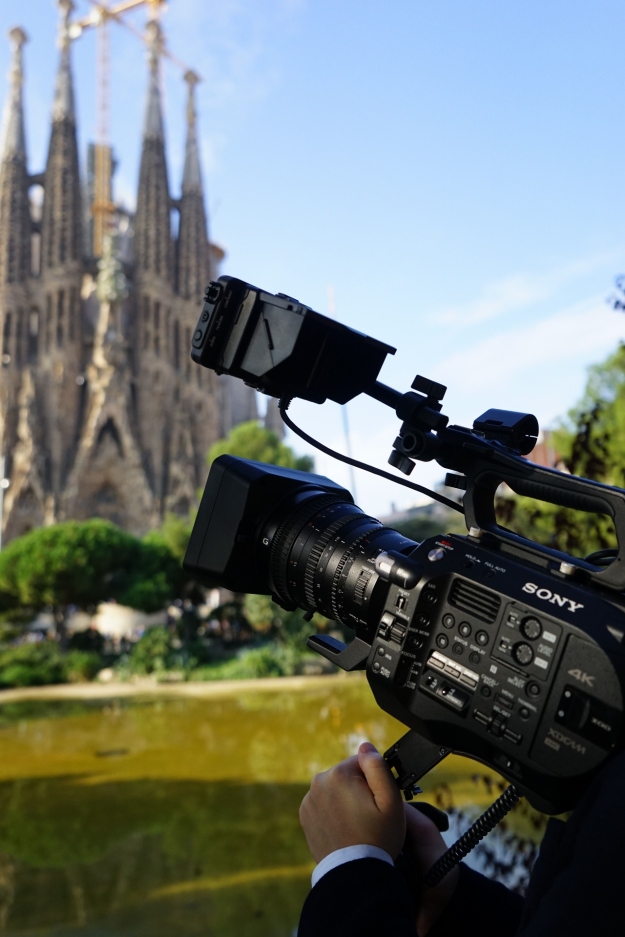
Bear in mind this is actually FS7 in RAW configuration: XDCA-FS7, V-mount battery, and at the other side of BNC cable: HXR-IFR5, AXS-R5 and olivine battery. FS7 II would be similar
That is why we need a device at the end of the cable that is capable to DECODE such signal, not only to record it. And for that, there are actually 3 ways: HXR-IFR5 + AXS-R5 from Sony, Atomos devices or Convergent Design Odyssey7Q+. After that conversion from data to RAW signal (done in HXR-IFR5, for instance), signal can be directly recorded in RAW (in AXS-R5), or transcoded into another format (in Convergent Design’s or Atomos’ equipment).
CONNECTIVITY
It’s exactly the same configuration as we had on FS7: a couple of SDI outputs, RAW output via XDCA-FS7 (together with genlock, reference, timecode in/out, V-mount batteries support, DC input and output), two XLR inputs and MI shoe.

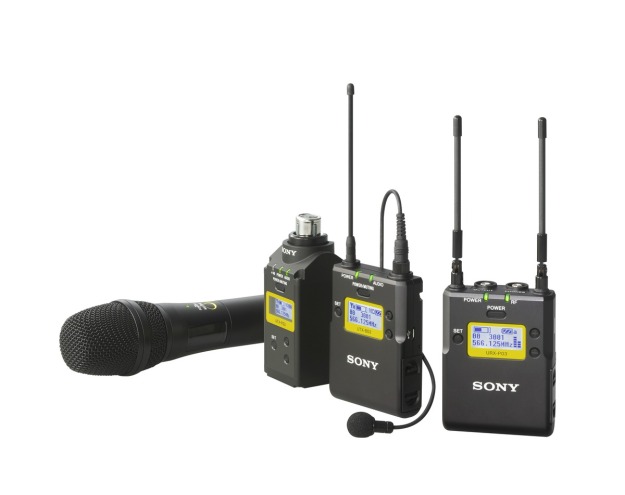
URX-P03D dual receiver installed in FS7 II via SMAD-P3D
That MI shoe (Multi-Interface) allows to connect, for example, a receiver from the UWP-D series. But, since September 2016, we have dual receivers available: an unique receiver to which we can connect two transmitters. That receiver would be connected to FS7 II via SMAD-P3D adapter. This solution is great for interviews, ENG or documentaries. There’s, obviously, an internal mic, which means a total of 5 inputs (2x via XLR, 2x via SMAD-P3D and 1x internal) that can be addressed to the 4 audio channels that FS7 II and FS7 can record.


Related to Wi-Fi, a dongle called IFU-WLM3 is supplied by default, allowing us to control the camera through Content Browser Mobile app. But, in order to make things easier, it’s not even necessary to log into camera’s SSID and to input its password; we can simply «touch» the FS7 II left part with our smartphone/tablet, and, if NFC is switched on, both devices will «start the conversation» via Wi-Fi (or the app dowload site for CBM will launch).
Also, there’s the chance to connect CBK-WA100, an external device that allows proxy recording and upload even through 4G/3G dongle.
CACHE RECORDING
When in a news environment, it’s not a strange situation being in front of a gate through which some VIP may come. Or, in a documentary, it’s a typical situation to be waiting for some animal to leave some hole or jump from a branch. With FS7 II, as with many other Sony XDCAM camcorders, a buffer is available, to allow us to recover up to the past 15 seconds, and continue the footage from the momento that REC button is pressed. This can be done, as said, with up to 15 seconds in MPEG-2 codec. So, you can simply «let things happen», and the contents will be ready then.
SIMULTANEOUS RECORDING
In FS7 II and FS7, a total of 3 REC buttons can be found: one -silver- in camera body, another one in the handle, and a third one in the grip. On the other hand, we have two XQD card slots. So, we can have 3 different configuations for those cards:
- Simultaneous REC: both cards will have the same contents, whatever the REC button we use. Nice for backups, or for addressing one card for edition and another for colour grading, for example.
- Continuous REC: since XQD cards are not as affordable as, let’s say, SD cards, it’s worth maximizing its capacity. This recording mode allows us to keep recording in a second card when the first one has run out of space, without any frame loss.
- (The most interesting one, IMHO) Independent REC trigger: imagine you’re shooting a live concert, and you wish to have the whole act in one card, and each of the songs on a separate clip. You can command one card with one of those 3 buttons, and the other one from another button. That’s useful not only for avoiding losing some relevant highlights, but also in case you’re shooting in a multi-camera environment, and you need to synchronize all footages.
LENS: SELP18110G
In case you’ve shot with the lens bundled in PXW-FS7K, called SELP28135G, you’ll have noticed that there’s some «tele» or «zoom» effect when recording: that lens is designed for a Full Frame sensor (as that of A7S/A7S II), and, thus, when a Super35 mm sensor is placed behind that lens, the capturing surface is smaller than light’s circle diameter, and we keep only the central part of the image.

Now, SELP18110G has been designed for Super35 and APS-C (Sony) sensor size, meaning that there will be no need to «convert», and the lens will provide a proper light diameter to the imager.
SELP18110G is also faster in response: when using the lens rings, they directly act over the optical mechanism, with immediate response. As we’ve seen in many Sony camcorders, we can easily switch from manual to auto focus by simply moving forward/backwards the focus ring, which, btw, now includes a «knurled» ring proper for mattebox directly, without belt.

Its aperture is constant F4; despite it might seem a bit dark when in wide angle, having a constant aperture simplifies operation regarding focus. In a classic lens, when shifting from tele to wide angle position means more light coming into the sensor, and, thus, a correction needs to be done -normally, over the iris adjustment-, so DoF or shutter needs to be modified, which involves an aesthetic payload (as we explained for the ND filter). But with a constant F4, no correction is needed, and DoF and fluence will remain the same along the whole zoom ratio.
OTHER LENSES
Despite Lever Lock-type E-mount involves a new way to attach lenses, all E-mount lenses (as of today, around 74) can be inserted before FS7 II. And, obviously, also lens adapters.
As distance between sensor and mount is small (remember: 18mm), each user can «build» his/her own lens via adapter. So, virtually ANY LENS CAN BE ATTACHED. And I say «any» because, even if FS7 II’s sensor would theoretically vignette when a narrower lens is used (e.g. a Super16 lens), a center scan mode can be applied to «crop» the signal and only read the central part. That could also be seen in A7S II, by the «APS-C mode», reducing its FF size into an APS-C/S35.
So, not only high-grade PL lenses can be used, as well as «vintage» FD or newer EF lenses, but also S16 or even broadcast 2/3″. In case you want to «recover» that light that would be lost by using full frame lenses, there are some adapters that can «correct» that effect by closing lens circle via another lens inside the adapter ring. So, no correction factor needs to be applied, and up to 1-1.5 stops can be earned – that’s the Metabones Speedbooster, and I won’t start a discussion about having an additional lens between a high-quality lens and your sensor.
AVAILABLE KITS
As for most of the interchangeable lens camcorders, two kits will be offered:
- PXW-FS7M2: body only
- PXW-FS7M2K: camera body + SELP18110G
In both cases, accessories are supplied: battery charger, AC/DC converter, BP-U30 battery pack, foldable hood, eyepiece, IFU-WLM3 Wi-Fi dongle…. You’ll only need to buy a XQD card to start shooting (remember to buy G or S series to be able to record in every codec).
Sorry for writing such a long article this time, but as you can see, there are both significant and subtle differences between FS7 II and FS7, and didn’t want to miss a lot of them when the camcorder finally reaches the market.
I really hope this was useful for you; a review video can also be found in my YouTube channel, and you can keep updated via my Twitter account, so see you there!
🙂
.


